Get Started: Manage models
In this guide, we will be using DVC Studio to manage our model registry. You can check out our example model in DVC Studio to see what it will look like once we finish all the steps in this guide.
To perform the model registry actions in this guide, follow these steps to sign in to DVC Studio, connect it to your Git account and add your repository as a DVC Studio project.
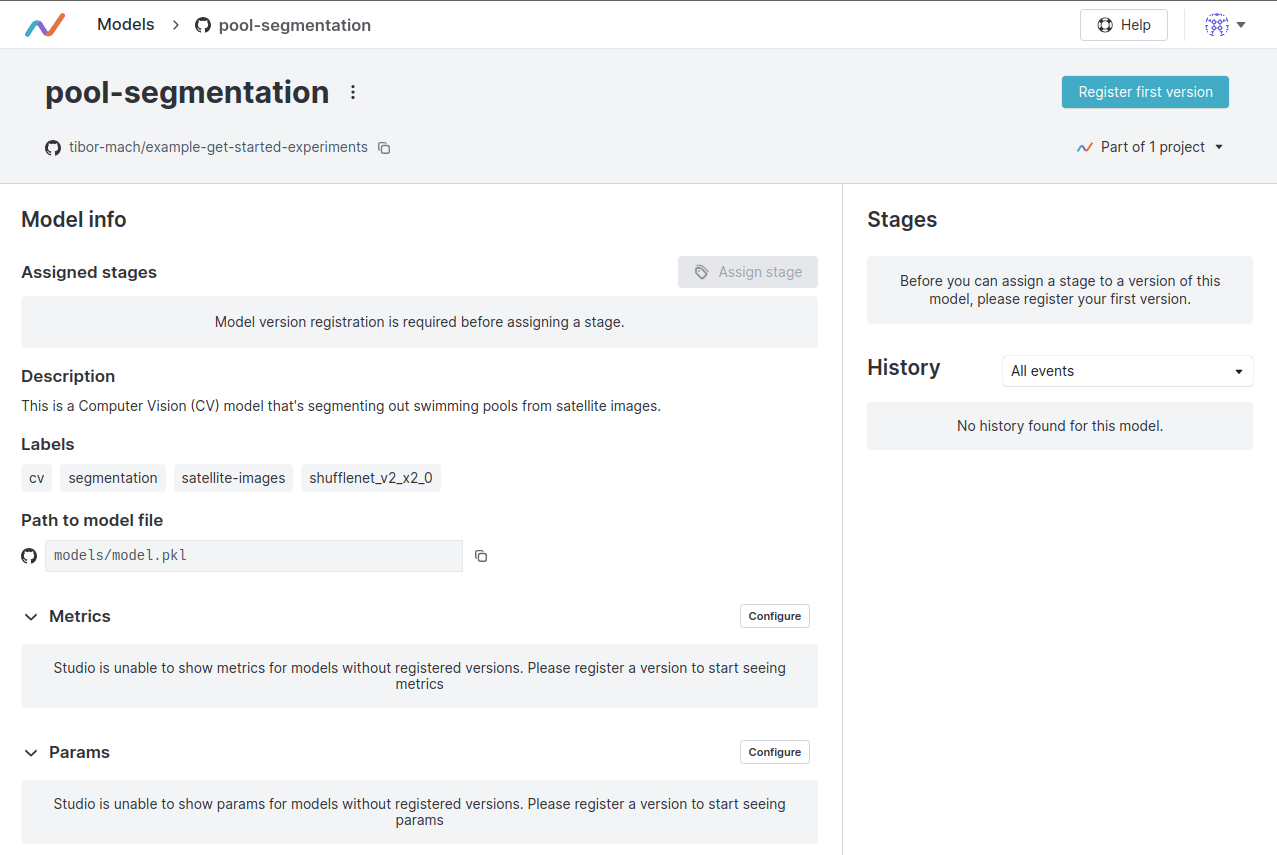
Now that we have added a model, you
should see something like the following picture in DVC Studio if you go to the
Models tab and then select the pool-segmentation model.
You can also see the state of the project at this point captured in our example repository.
Behind the scenes, DVC Studio uses a command line tool called GTO for most model registry actions.
With GTO you can also set up the model registry locally without DVC Studio. You can see how this is done in the expandable "Under the hood" sections in this chapter.
When you register model versions, assign or remove stages or deprecate models, GTO assigns particularly formatted Git tags to selected commits and these are then parsed by the model registry to keep track of the model lifecycle history.
This means that all the metadata used by the model registry is actually stored in your Git repository!
It also allows you to use GTO directly instead of the DVC Studio UI to manage your model lifecycle. That can be useful for example if you want to trigger certain model registry actions programmatically. You can learn more about the details of GTO in its documentation.
If you don't have a DVC Studio account at all, you will have to manage a model registry separately for each Git repository however.
Versioning models
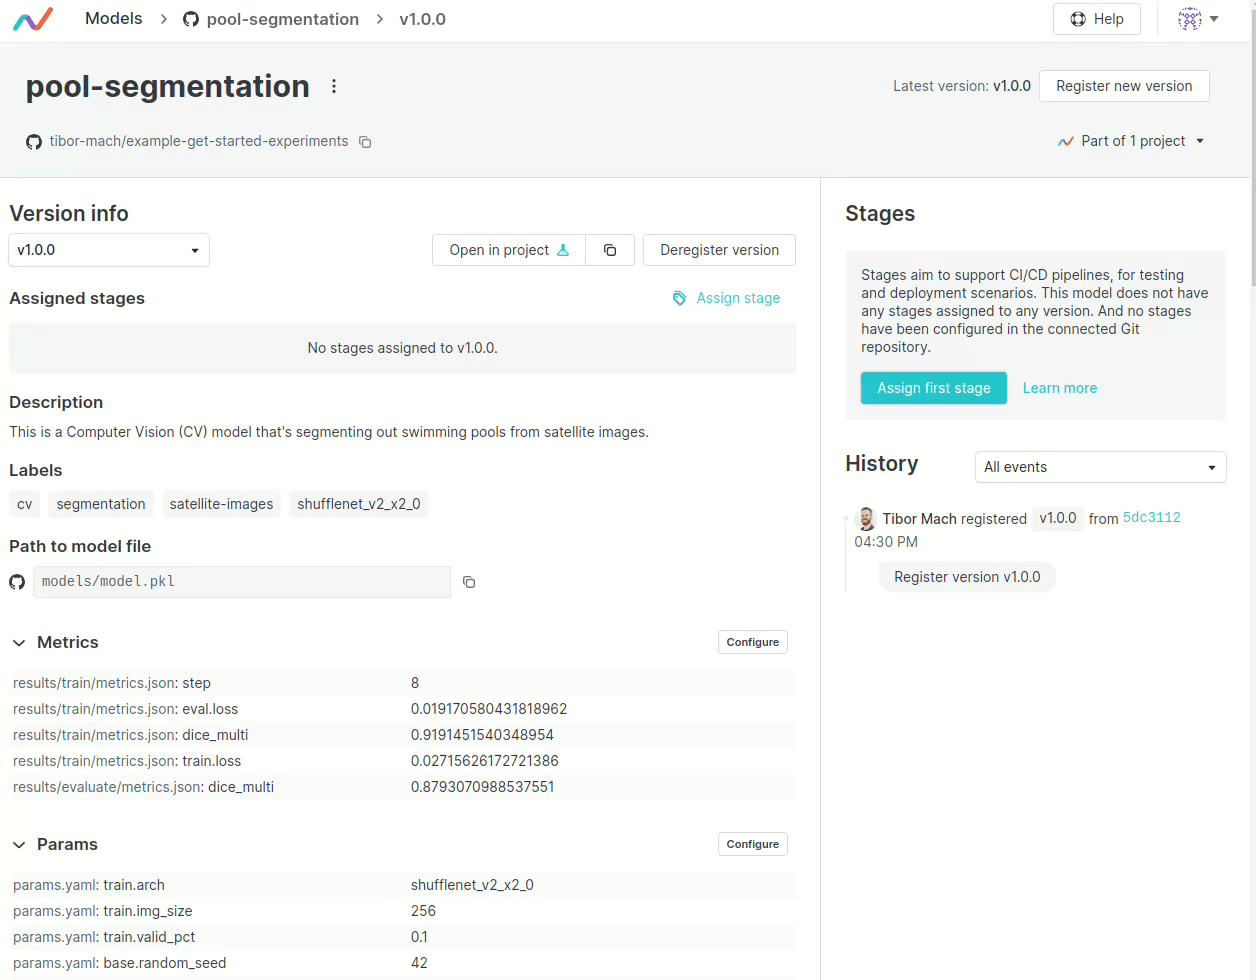
Now that we have our first model in the model registry, we can start registering model versions for the model. We do it by choosing a specific commit in our model development history and attaching a version to it to make it easier to keep track of it. You can now do that directly in the DVC Studio UI as follows.
Since we saved our model to DVC and added it to the model registry in the latest commit, we can just keep the commit which was selected by DVC Studio automatically. We will also keep the suggested version number v1.0.0.
For more details and other ways of registering model versions you can have a look at the corresponding documentation.
Once we register our first model version, DVC Studio will also automatically connect it to experiment tracking and all metrics which are tracked there will also show up in the model registry for each model version.
Registering the model version as we just did using DVC Studio is equivalent to the following GTO command
gto register pool-segmentation [ref] --version v1.0.0Here, [ref] is the Git reference/hash we selected from the menu in DVC Studio.
For more details you can have a look at the gto register command reference.
Assigning lifecycle stages
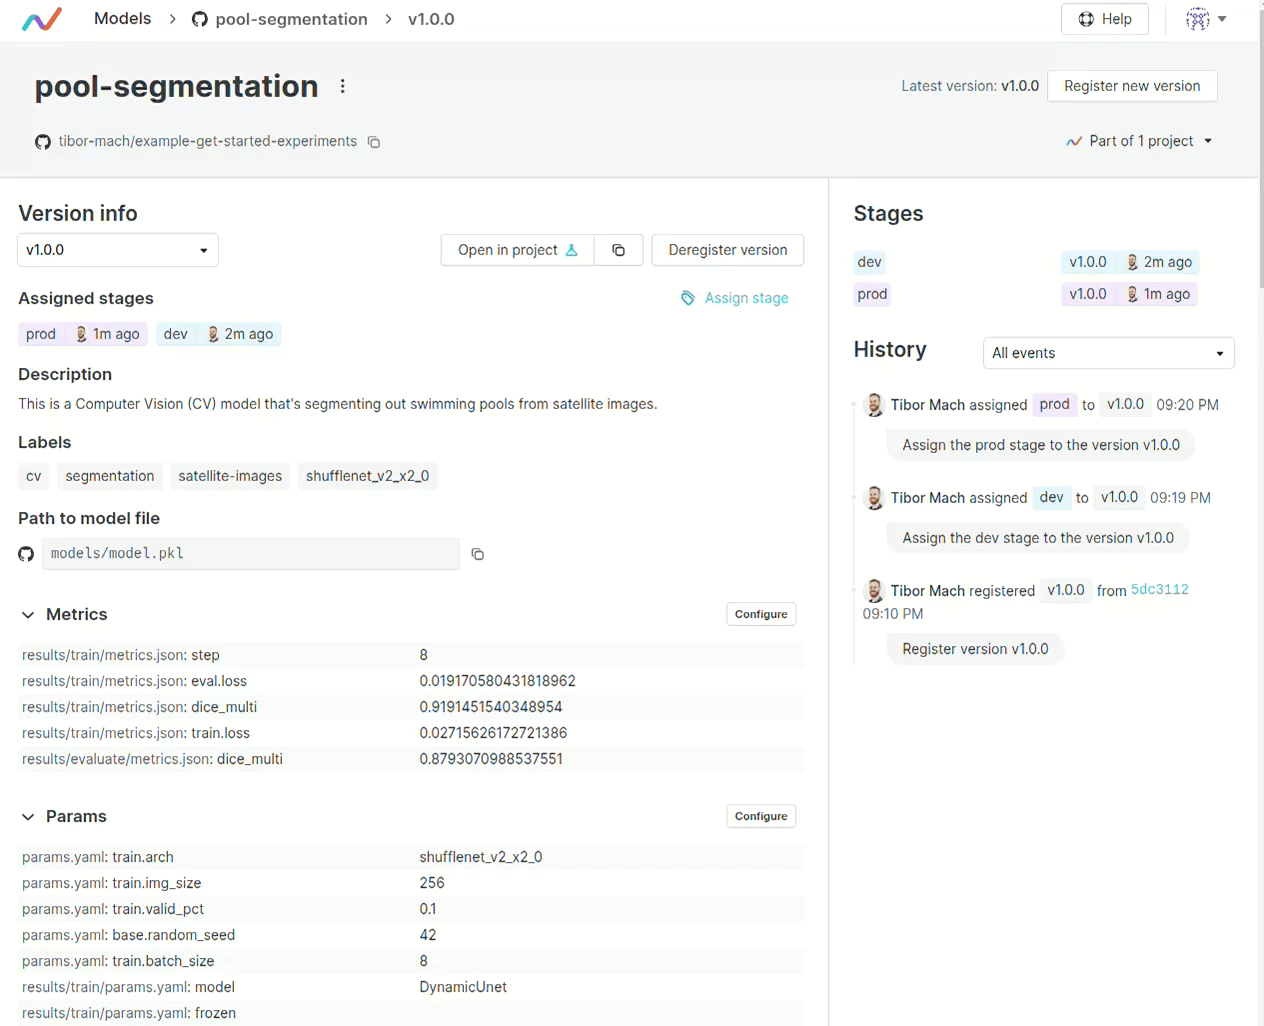
We have a first version for our model and now it is a good time to assign a model lifecycle stage to it. You can create any number of lifecycle stages with any names you wish but in this example we will only create two stages called "dev" and "prod".
Stages are created whenever a model version is assigned to them. You can now assign the model version 1.0.0 to the "dev" stage as follows.
When we assign the model to a stage, it can automatically trigger actions in our CICD workflows, like deploying the model to a new environment (we will explore how this is done in the Use and Deploy models chapter).
Assigning the "dev" stage to the model as we just did using DVC Studio is equivalent to the following GTO command.
gto assign pool-segmentation --version v1.0.0 --stage devFor more details you can have a look at the gto assign command reference.
Changing (and removing) stage assignments
Let's say that we've decided to promote our model version 1.0.0 to production and denote that it is no longer in the "dev" stage. First, assign the model version to the "prod" stage just like we did with the "dev" stage in the previous section.
Now, to remove the "dev" stage from our model version 1.0.0 and assign it only to "prod", follow these steps:
It is also possible to de-register model versions or deprecate and remove models from the registry entirely. To see how, have a look at the documentation.
The detailed view of our model in the registry should now match what we see in our example.
Whenever we un-assign stages, de-register model versions and deprecate models, DVC Studio uses the GTO library under the hood. It is also possible to use GTO manually to perform these actions. To see how, have a look at the gto deprecate command reference.
Auditing model history
Every action we performed in our model registry leaves a trace so that the model history can be audited. If you now look at the model details page of our model, you should see something like this:
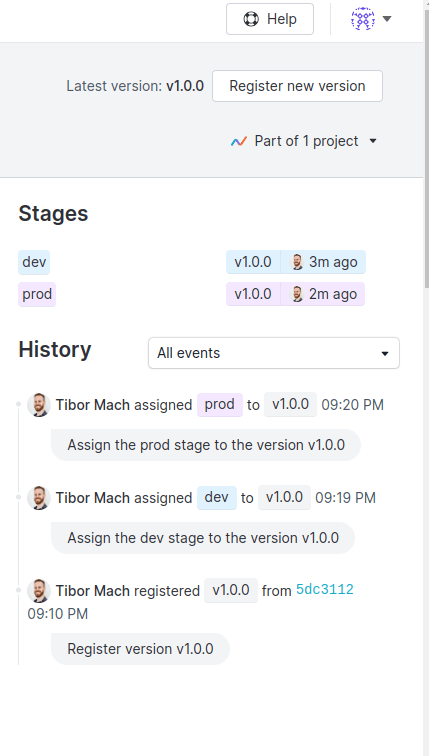
As we noted above, DVC uses special Git tags to keep track of model registry actions, so all of this history is actually stored directly in your Git repository. DVC Studio can parse these tags and show them to us in a user-friendly way.
If you look at the tags in our example repository, you can see that all the model registry actions that we performed are captured by such tags. In the next section, we will see how to use these tags to access model versions and trigger automated deployments or other CICD workflows.