Teams
You can create teams with one or more team members. The team members are also called collaborators, and you can assign different roles to them. The projects that you create in your team's page will be accessible to all members of the team.
In this page, you will learn about:
- How to create a team
- How to invite collaborators (team members)
- The privileges (access permissions) of different roles
- How to manage the team and its projects
- How to manage connections to self-hosted GitLab servers
- How to configure Single Sign-on (SSO)
- How to upgrade to an Enterprise plan
Create a team
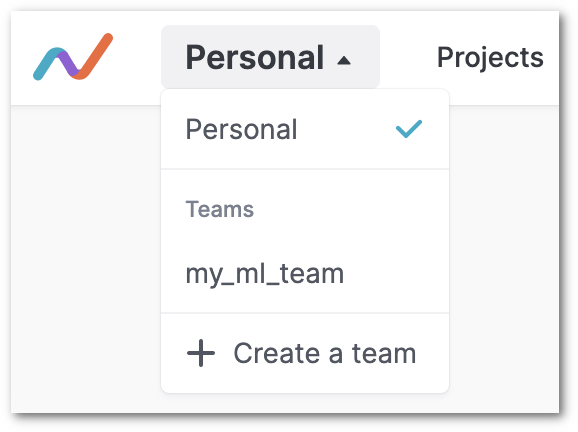
Click on the drop down next to Personal. All the teams that you have created
so far will be listed within Teams in the drop down menu. If you have not
created any team so far, this list will be empty.
To create a new team, click on Create a team.
You will be asked to enter the URL namespace for your team. Enter a unique name.
The URL for your team will be formed using this name.
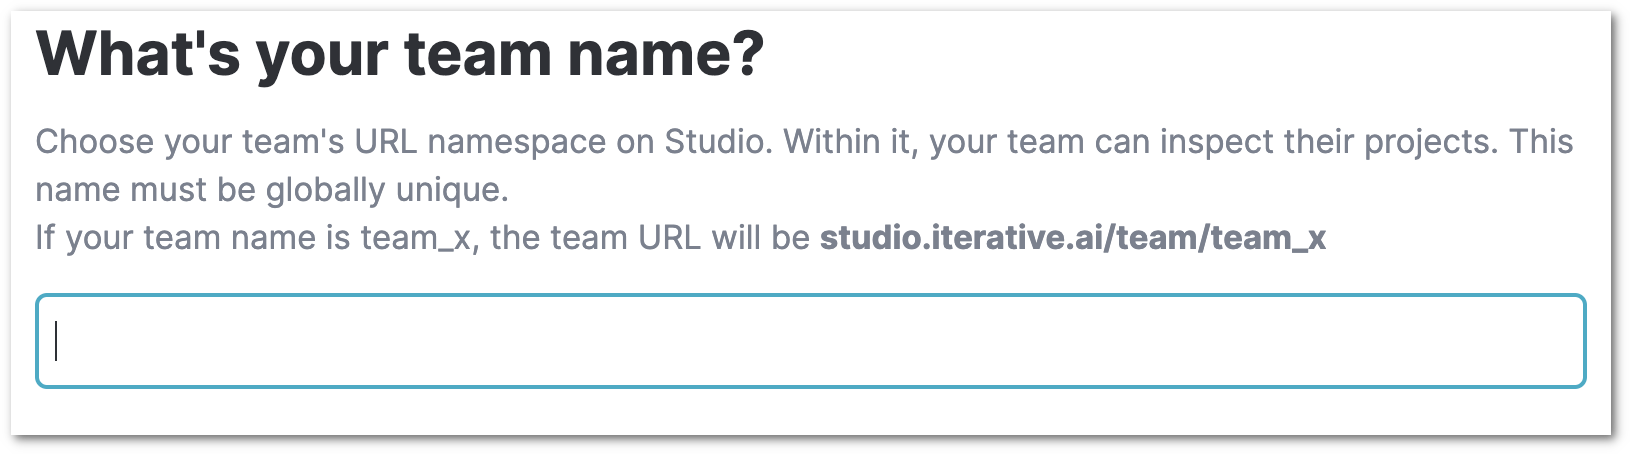
Then, click the Create team button on the top right corner.
Invite collaborators
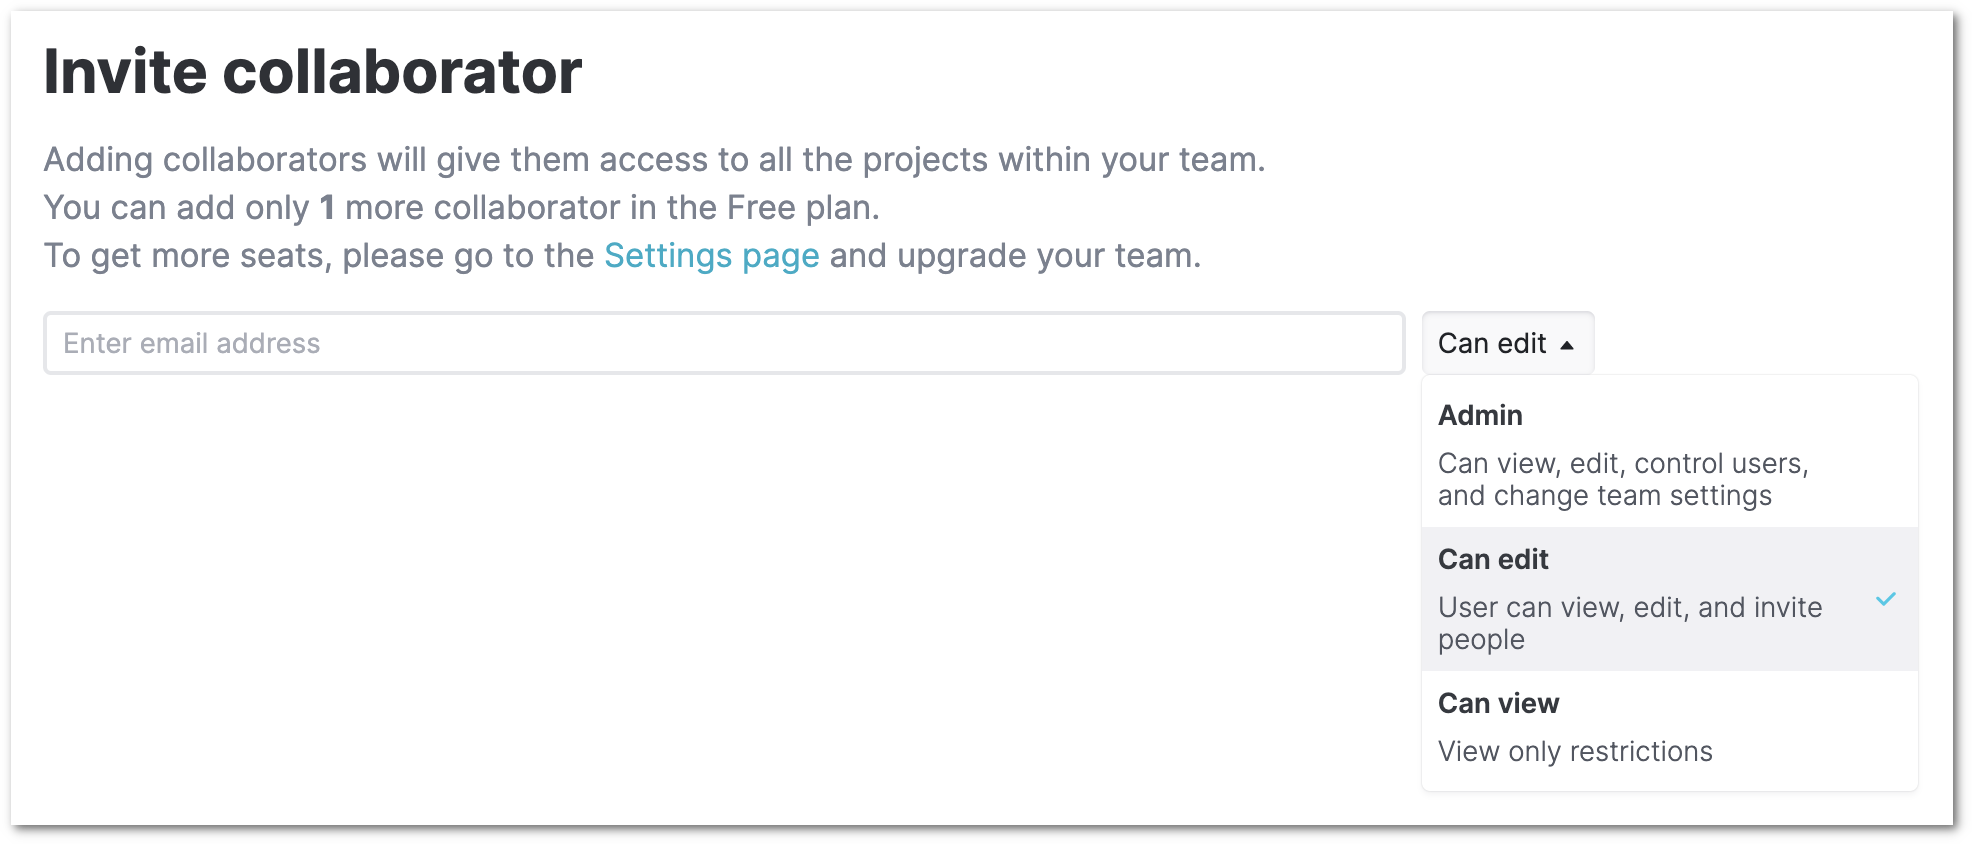
To add collaborators, enter their email addresses. Each collaborator can be
assigned the Admin, Edit, or View role. An email invite will be sent
to each invitee. Then, click on Send invites and close.
You can also click on Skip and close to skip adding collaborators while
creating the team, and
add them later by accessing team settings.
Roles
Team members or collaborators can have the following roles:
Viewershave read-only access to the projects created by other team members.Editorscan create and edit the team's projects.Adminshave full access to the team's projects and settings. They can add (invite) and remove collaborators as well as change team settings such as cloud credentials (data remotes).- An additional role
Visitorexists for anonymous users who can open a public project.
DVC Studio does not have the concept of an Owner role. The user who creates
the team has the Admin role. The privileges of such an admin is the same as
that of any other collaborator who has been assigned the Admin role.
If your Git account does not have write access on the Git repository connected
to a project, you cannot push changes (e.g., new experiments) to the repository
even if the project belongs to a team where you are an Editor or Admin.
Privileges to create, open and access the team's projects
| Feature | Visitor | Viewer | Editor | Admin |
|---|---|---|---|---|
| Open a team's project | Yes* | Yes | Yes | Yes |
| Apply filters | Yes* | Yes | Yes | Yes |
| Show / hide columns | Yes* | Yes | Yes | Yes |
| Save the project filters and columns settings | No | No | Yes | Yes |
| View CML reports | No | No | Yes | Yes |
| Share a project | No | No | Yes | Yes |
| Add a new project | No | No | Yes | Yes |
| Re-import repository | No | No | Yes | Yes |
| Delete a project | No | No | Yes | Yes |
*Visitors can access only the public projects of the team.
Privileges to manage project settings
| Feature | Visitor | Viewer | Editor | Admin |
|---|---|---|---|---|
| Change project name | No | No | Yes | Yes |
| Specify project directory | No | No | Yes | Yes |
| Use existing cloud / data remote credentials | No | No | Yes | Yes |
| Configure cloud / data remote credentials | No | No | No | Yes |
| Manage columns | No | No | Yes | Yes |
Privileges in the team's model registry
| Feature | Visitor | Viewer | Editor | Admin |
|---|---|---|---|---|
| Access a team's models dashboard | No | Yes | Yes | Yes |
| Access a team's model details page | No | Yes | Yes | Yes |
| Perform model actions in the team's model registry - add / deprecate models - register / deregsiter versions - assign / unassign stages | No | Yes* | Yes* | Yes* |
*All team members can submit model actions in DVC Studio. But for a team member's actions to successfully complete, the team member must have write access in the Git repository from where the model was added. This is because any model action constitutes writing a Git commit, pull/merge request or tag to the Git repository. If the team member does not have this write access, then the model action will fail.
Privileges to manage the team
| Feature | Visitor | Viewer | Editor | Admin |
|---|---|---|---|---|
| Manage team settings | No | No | No | Yes |
| Manage team collaborators | No | No | No | Yes |
| Manage team plan and billing | No | No | No | Yes |
| Delete a team | No | No | No | Yes |
Manage your team and its projects
Once you have created the team, the team's workspace opens up.
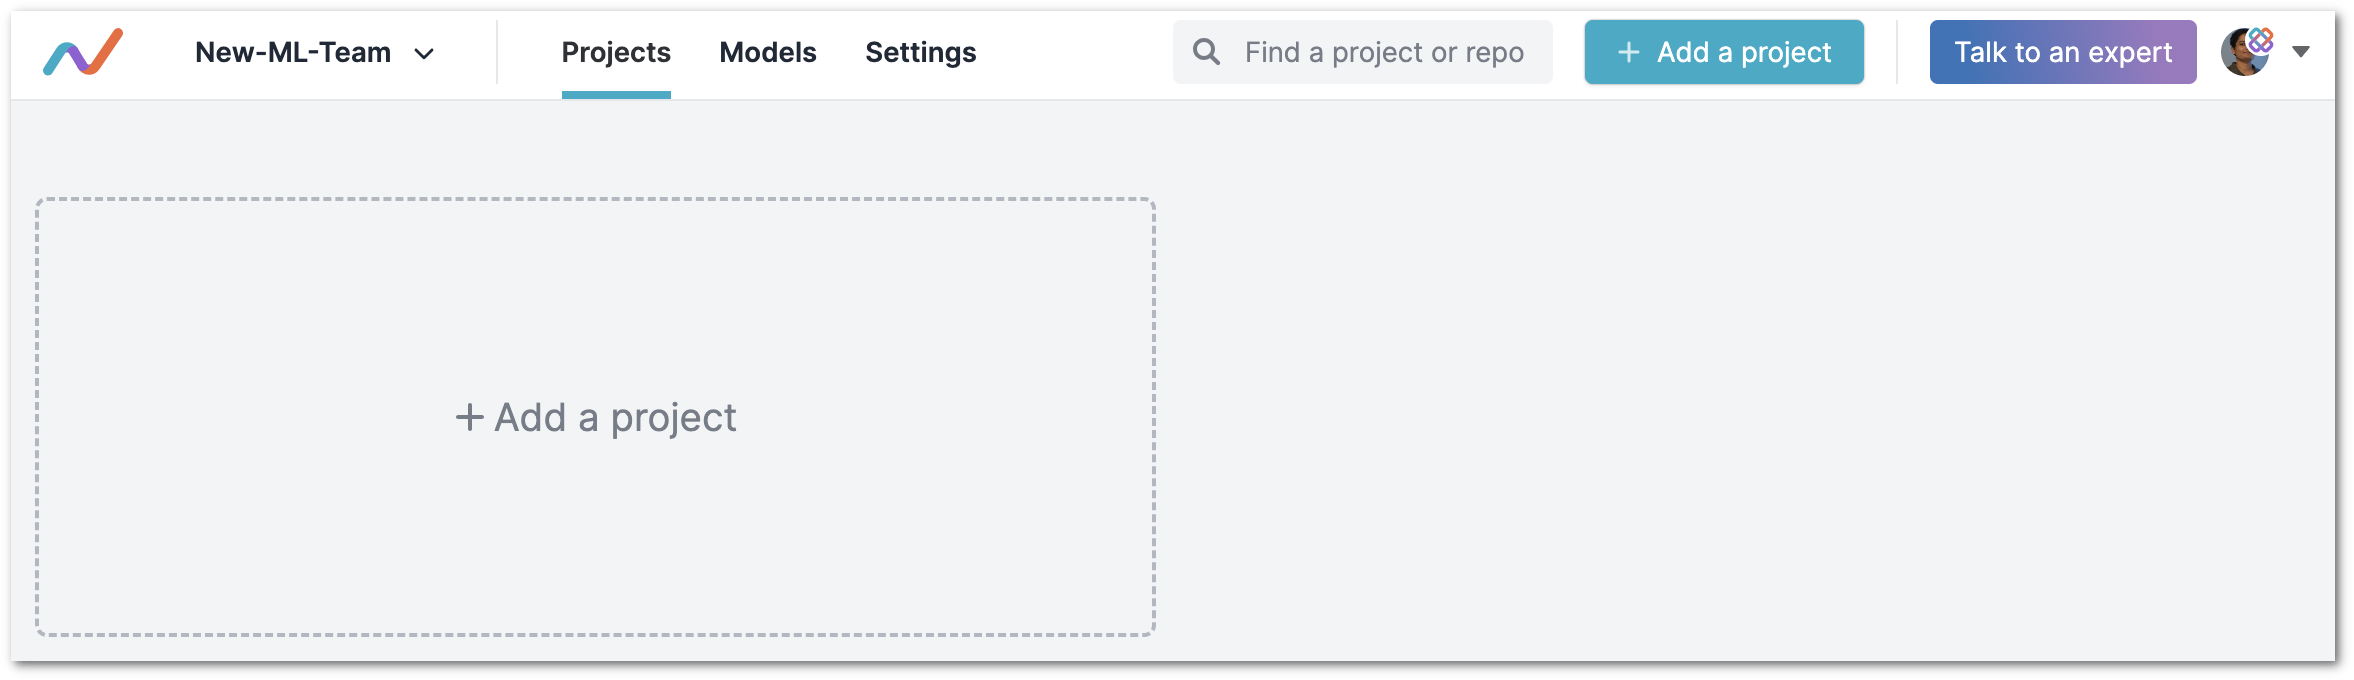
In this workspace, there are 3 pages - Projects, Models and Settings.
Projects
This is the projects dashboard for the team. All the projects on this dashboard are accessible to all members (collaborators) of the team.
To add a project to this dashboard, click on Add a project. The process for
adding a project is the same as that for adding personal projects
(instructions).
Models
This is the models dashboard for the team. All the models on this dashboard are accessible to all members (collaborators) of the team. The process for adding a model is the same as that for adding personal models (instructions).
Settings
In the team settings page, you can change the team name, add credentials for the data remotes, and delete the team. Note that these settings are applicable to the team and are thus different from project settings.
Additionally, you can also manage connections to self-hosted GitLab servers, configure sso, edit collaborators.
Manage connections to self-hosted GitLab servers
If your team’s Git repositories are on a self-hosted GitLab server, you can go
to the GitLab connections section of the team settings page to set up a
connection to this server. Once you set up the connection, all your team members
can connect to the Git repositories on this server. For more details, refer to
Custom GitLab Server Connection.
Configure Single Sign-on (SSO)
Single Sign-on (SSO) allows your team members to authenticate to DVC Studio using your organization's identity Provider (IdP) such as Okta, LDAP, Microsoft AD, etc.
Details on how to configure SSO for your team can be found here.
Once the SSO configuration is complete, users can login to DVC Studio using
their team's login page at
http://studio.datachain.ai/api/teams/<TEAM_NAME>/sso. They can also login
directly from their Okta dashboards by clicking on the DVC Studio integration
icon.
If a user does not have a pre-assigned role when they sign in to a team, they
will be auto-assigned the Viewer role.
Edit collaborators
To manage the collaborators (team members) of your team, go to the
Collaborators section of the team settings page. Here you can invite new team
members as well as remove or change the roles of existing team
members.
The number of collaborators in your team depends on your team plan. By default, all teams are on the Free plan, and can have 2 collaborators. To add more collaborators, upgrade to the Enterprise plan.
All collaborators and pending invites get counted in the subscription. Suppose you have subscribed for a 10 member team. If you have 5 members who have accepted your team invite and 3 pending invites, then you will have 2 remaining seats. This means that you can invite 2 more collaborators. At this point, if you remove any one team member or pending invite, that seat becomes available and so you will have 3 remaining seats.
Get Enterprise
To upgrade to the Enterprise plan, schedule a call with our in-house experts. They will try to understand your needs and suggest a suitable plan and pricing.