Amazon SageMaker
Development
Setup
Many DVC features rely on Git. To work with DVC in Amazon SageMaker, first setup your Git repo:
-
Clone a repository.
-
Launch a terminal or notebook and configure the Git user name and email:
git config --global user.name ... git config --global user.email ... -
Don't forget to install DVC and any other requirements in your environment!
pip install dvc dvclive
Notebooks
After completing the setup, you can work with DVC in SageMaker notebooks like you would in any other environment. Take a look at DVC experiments for how to get started with DVC in notebooks (if you have setup code-server on SageMaker, you can also install the DVC extension for VS Code).
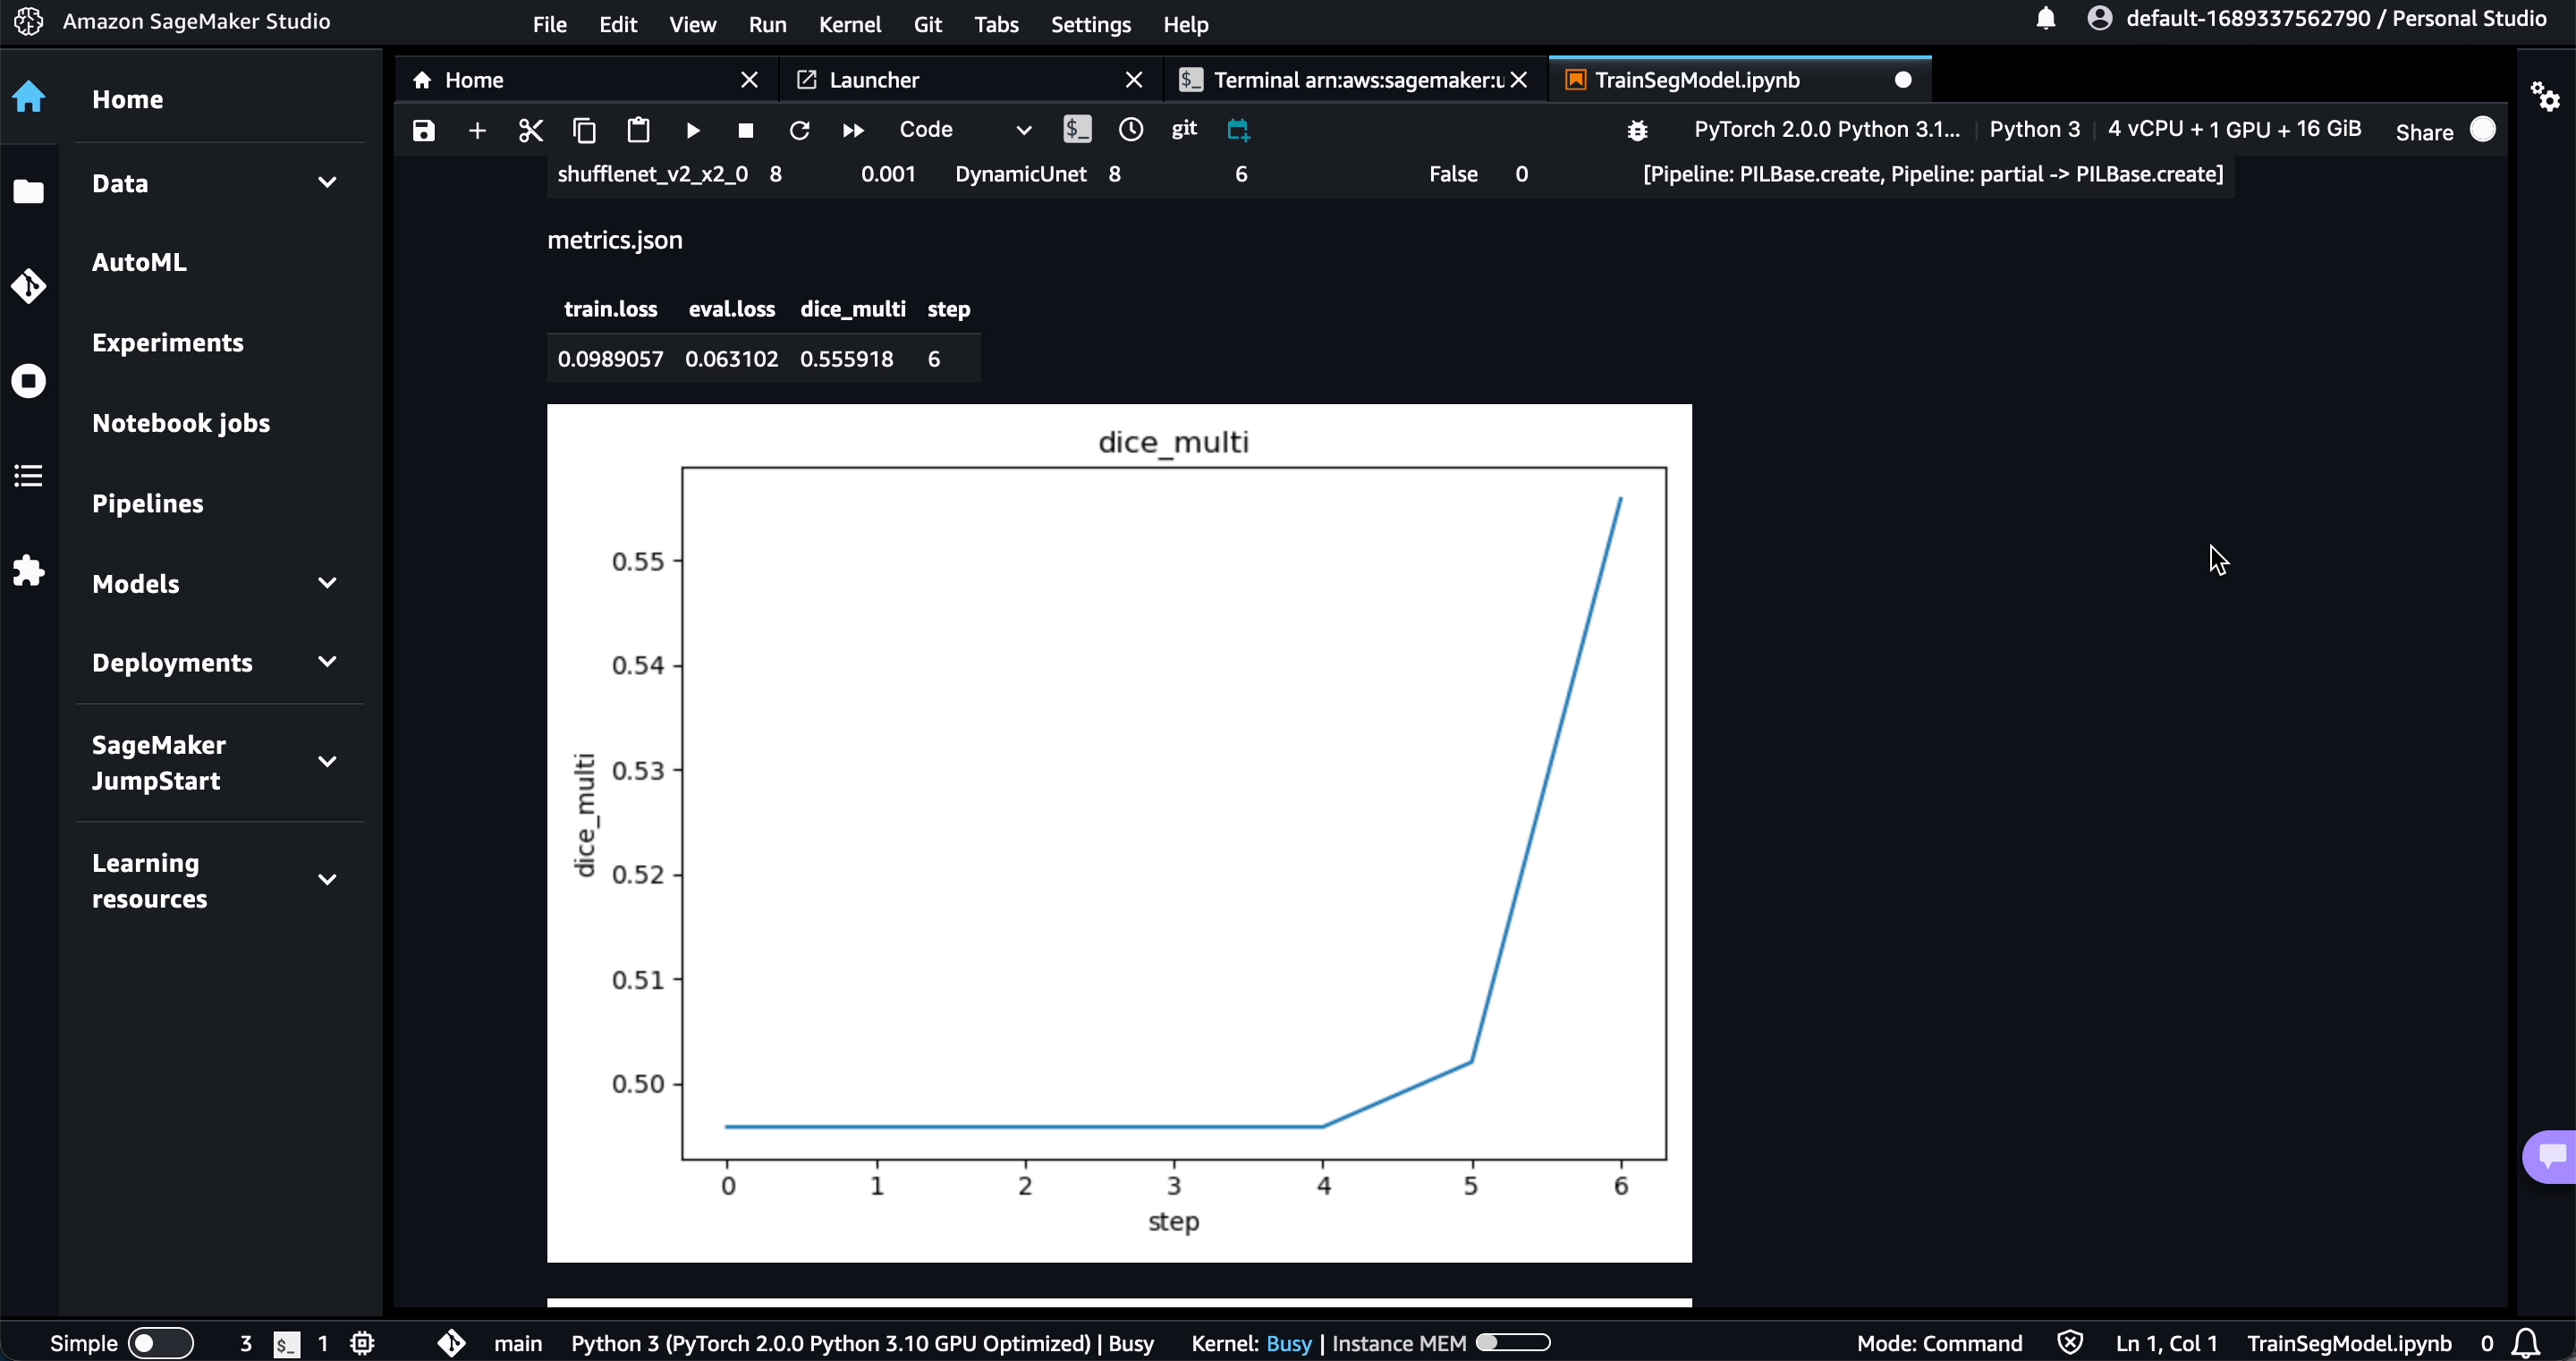
If you would like to see live experiment updates in DVC Studio, set your token:
$ dvc studio loginWhile the experiment runs, you will see live updates like this in DVC Studio:
Pipelines
You can run SageMaker jobs in DVC pipelines or convert existing SageMaker pipelines into DVC pipelines. This combines the benefits of SageMaker jobs, like running each stage on its own EC2 instance and enabling other data input modes, with the benefits of DVC pipelines, like skipping unchanged stages and tracking the inputs and outputs of each run. SageMaker expects all inputs and outputs to be stored in S3, so the easiest way to integrate with DVC is to use S3 storage, and utilize external dependencies and outputs.
Example: XGBoost pipeline
For an example, see https://github.com/iterative/sagemaker-pipeline, which
adapts an existing SageMaker tutorial from a notebook into a DVC pipeline. The
first stage (prepare) downloads the data and tracks the output so that it
doesn't have to be re-downloaded on each run. We parametrize the bucket and
prefix of the destination into a separate params.yaml file so they can be
modified easily. The DVC pipeline stage is defined in dvc.yaml like this:
prepare:
  cmd:
    - wget
      https://sagemaker-sample-data-us-west-2.s3-us-west-2.amazonaws.com/autopilot/direct_marketing/bank-additional.zip
      -O bank-additional.zip
    - python sm_prepare.py --bucket ${bucket} --prefix ${prefix}
  deps:
    - sm_prepare.py
    - https://sagemaker-sample-data-us-west-2.s3-us-west-2.amazonaws.com/autopilot/direct_marketing/bank-additional.zip
  outs:
    - s3://${bucket}/${prefix}/input_data:
        cache: false
The preprocessing script takes bucket and prefix as arguments and
otherwise is copied directly from the original notebook code, which uses a
SageMaker Processing job. The DVC pipeline stage tracks the command, scripts,
input paths, and outputs paths, so that this stage will only be run again if any
of those change:
preprocessing:
  cmd: python sm_preprocessing.py --bucket ${bucket} --prefix ${prefix}
  deps:
    - sm_preprocessing.py
    - preprocessing.py
    - s3://${bucket}/${prefix}/input_data
  outs:
    - s3://${bucket}/${prefix}/train:
        cache: false
    - s3://${bucket}/${prefix}/validation:
        cache: false
    - s3://${bucket}/${prefix}/test:
        cache: false
Finally, the training script uses the SageMaker Estimator for XGBoost to train
a model. We add all the model hyperparameters as arguments to make it easy to
tune hyperparameters and track what changed. Hyperparameters are added under the
train key in params.yaml. The DVC pipeline stage cmd includes ${train}
to
unpack and pass
all those arguments and track them as parameters, in addition to tracking the
other inputs and outputs:
training:
cmd: python sm_training.py --bucket ${bucket} --prefix ${prefix} ${train}
deps:
- sm_training.py
- s3://${bucket}/${prefix}/train
- s3://${bucket}/${prefix}/validation
outs:
- s3://${bucket}/${prefix}/output:
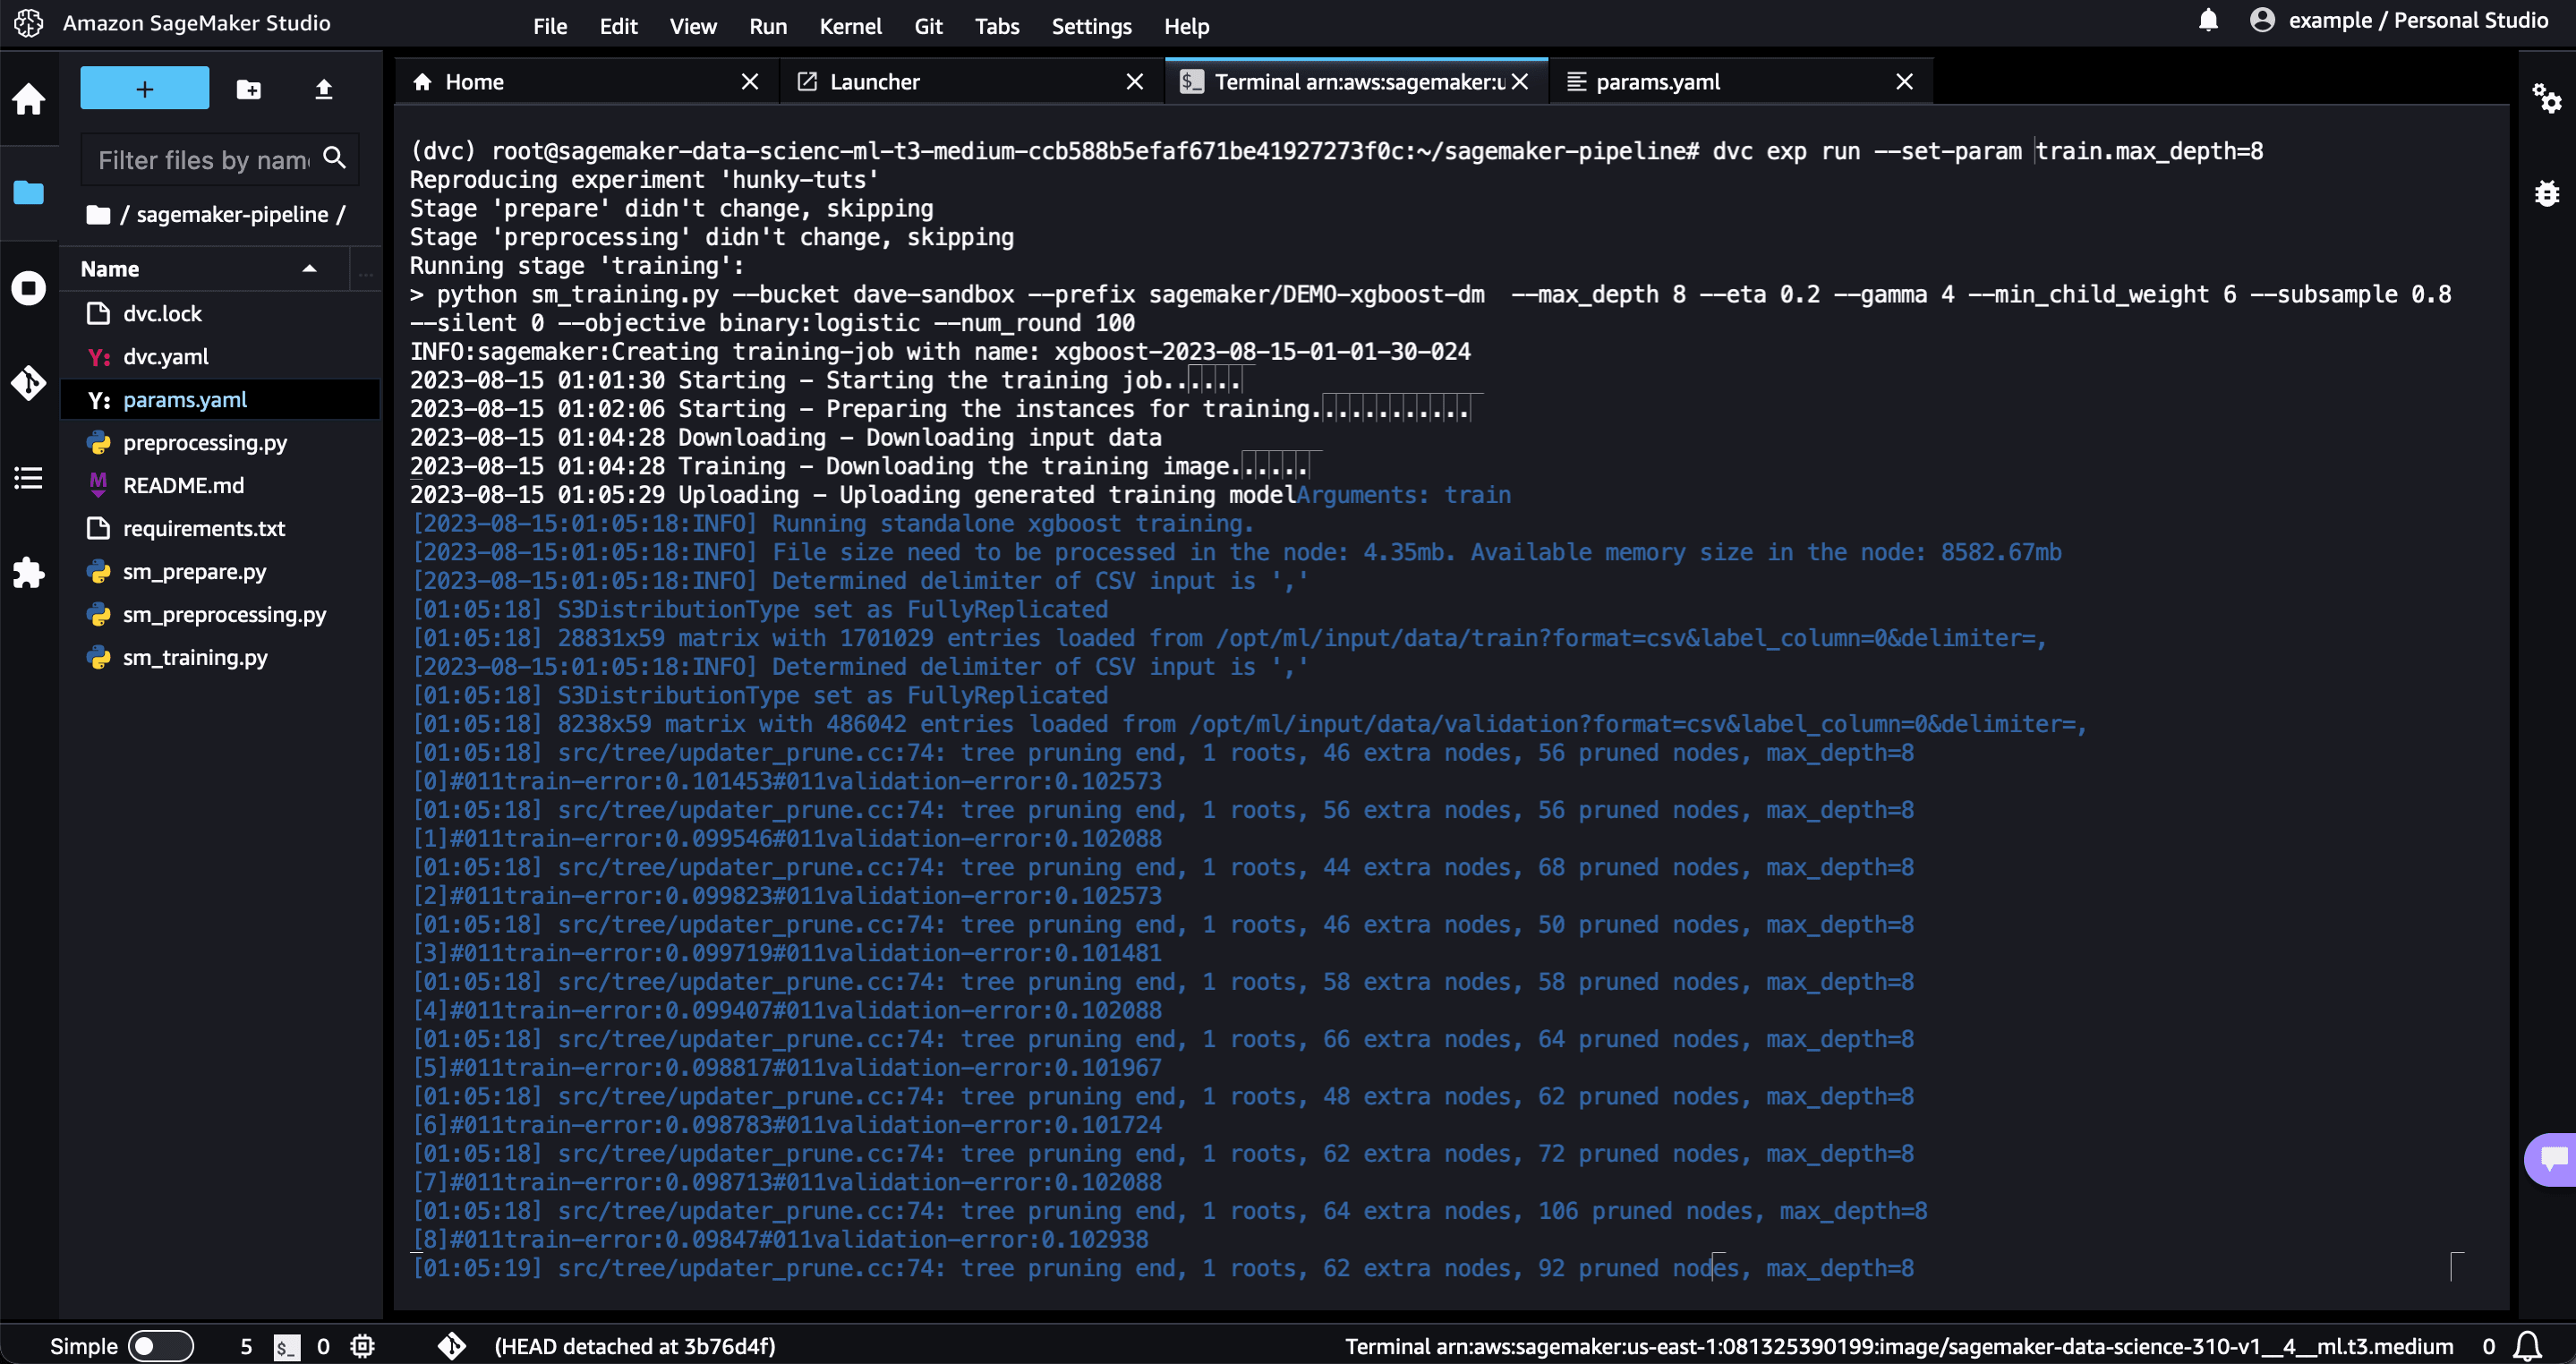
cache: falseThe end result of running the pipeline looks like this:
Live experiment updates in SageMaker jobs
SageMaker jobs run outside of your Git repository, so experiment metrics and plots will not be automatically tracked in the repository. However, you can see live experiment updates in DVC Studio.
First, set the DVC_STUDIO_TOKEN and DVC_EXP_GIT_REMOTE environment
variables.
$ export DVC_STUDIO_TOKEN="<token>"
$ export DVC_EXP_GIT_REMOTE="https://github.com/<org>/<repo>"
If you are running DVC pipelines and logged in to Studio, these environment variables will be automatically set by DVC, and you can skip the first step. You still must pass the environment variables to the SageMaker job.
Then pass them to the SageMaker job:
import os
from sagemaker.estimator import Estimator

env = {name: value for name, value in os.environ.items() if name.startswith("DVC")}

estimator = Estimator(
    environment=env,
    entry_point="train.py",
    source_dir="src",
    ...
)
For any DVCLive metrics and plots logged in the entry_point script, you
should now see live updates in Studio. To use DVCLive in the script, you must
also include dvclive in a requirements.txt file inside your source_dir.
Deployment
Use the model registry to automate deployment with SageMaker in your CI/CD workflow. To start with the model registry, see how to:
For a full example of how to deploy with SageMaker, see our blog post.